8 Steps to Prepare a Greenhouse for a Productive Spring Planting Season
The first warm afternoon in late February carries a promise. You step into your cold greenhouse and smell damp earth mixed with the faint sweetness of overwintered compost. This is the moment to start preparing a greenhouse for spring planting, and the work you do now determines whether you harvest abundantly in May or scramble to catch up all season.
Materials & Supplies
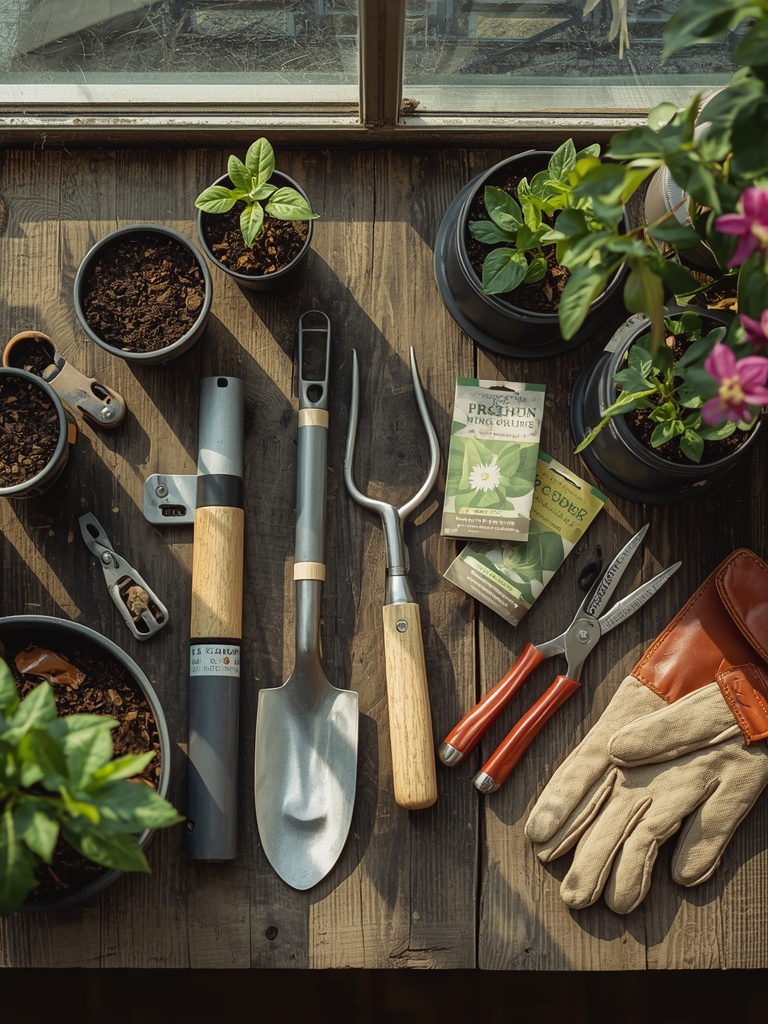
Gather your tools before you begin. You need a stiff brush, a bucket, unscented dish soap, and a 10% bleach solution (1 part bleach to 9 parts water). For soil preparation, stock compost with a pH between 6.0 and 6.8, and use a balanced organic fertilizer at 5-5-5 NPK for seedlings. Later, switch to 10-10-10 for fruiting crops like tomatoes and peppers.
Keep seedling trays, heat mats set to 75°F, and a soil thermometer within arm's reach. Buy mycorrhizal inoculant to boost root development. Stock row cover fabric rated to 28°F for unexpected cold snaps. Label everything with waterproof markers.
Timing & Growing Schedule
Your hardiness zone dictates when you can safely transplant. Zone 5 gardeners start seeds indoors 8 weeks before the last frost (typically mid-May). Zone 7 growers can begin in early March for an April transplant. Days to maturity matter. Lettuce needs 45 days, while heirloom tomatoes require 85 days minimum.
Count backward from your target harvest date. If you want tomatoes by June 15 in Zone 6, start seeds indoors by March 1. Cold-hardy crops like kale and spinach tolerate soil temperatures as low as 40°F. Warm-season plants demand soil above 60°F before transplanting.
Step-by-Step Instructions
Step 1: Deep Clean All Surfaces
Scrub glazing panels inside and out. Algae and dust block 30% of available light. Use your stiff brush and soapy water, then rinse thoroughly. Wipe down benches, shelves, and pots with the bleach solution to kill overwintering pathogens.
Pro-Tip: Clean on a cloudy day. Direct sun dries bleach too fast, reducing its disinfecting power.
Step 2: Inspect and Repair Structural Damage
Check for cracked panels, torn screens, and gaps around vents. Mice squeeze through holes the size of a dime. Seal cracks with silicone caulk rated for outdoor use. Replace weatherstripping on doors.
Pro-Tip: Apply caulk when temperatures exceed 50°F. Cold air prevents proper adhesion.
Step 3: Test and Calibrate Ventilation
Open all vents and fans. Greenhouses can hit 90°F on sunny March days, cooking tender seedlings. Install automatic vent openers set to trigger at 75°F. Check that exhaust fans pull air efficiently.
Pro-Tip: Position a thermometer at plant height, not at eye level. Heat stratifies, and your seedlings experience different conditions than you do.
Step 4: Prepare Soil or Growing Media
If you grow in beds, turn the top 6 inches of soil. Mix in 2 inches of finished compost. Test pH with a probe or mail-in kit. Adjust with lime (to raise) or sulfur (to lower). Let amended soil rest for 10 days before planting.
Pro-Tip: Add mycorrhizal fungi directly into transplant holes, not broadcast over beds. Direct root contact activates symbiosis faster.
Step 5: Set Up Seed Starting Stations
Arrange heat mats on clean benches. Place trays on mats and fill cells with sterile seed-starting mix. Moisten the mix until water drips from the bottom. Sow seeds at twice their diameter in depth.
Pro-Tip: Bottom watering prevents damping-off fungus. Set trays in shallow water for 10 minutes, then drain completely.
Step 6: Install Proper Lighting
Natural light in early spring is weak. Hang full-spectrum LED grow lights 4 inches above seedlings. Run lights for 14 hours daily. Raise fixtures as plants grow to maintain the 4-inch gap.
Pro-Tip: Seedlings leaning toward light are stretching. Lower the temperature by 5°F at night to produce stockier stems.
Step 7: Monitor Temperature and Humidity
Keep daytime temperatures between 70°F and 75°F. Drop nighttime temps to 60°F. This temperature differential strengthens cell walls. Maintain 50% to 60% relative humidity. Higher levels invite fungal disease.
Pro-Tip: Place a small fan on low speed to circulate air. Gentle movement mimics outdoor breezes and prevents leggy growth.
Step 8: Harden Off Transplants Gradually
Two weeks before transplanting outdoors, move seedlings outside for one hour in dappled shade. Increase exposure by one hour daily. By day 10, leave them out overnight if temperatures stay above 45°F.
Pro-Tip: Wind is harsher than cold. Protect plants behind a windbreak during hardening off.
Nutritional & Environmental Benefits
Greenhouse-grown spring greens contain higher levels of vitamin C and folate than supermarket equivalents. You control inputs, so you avoid pesticide residues. Early planting extends your harvest window by 6 weeks, providing fresh food when markets offer only storage crops.
Diverse plantings attract beneficial insects. Mason bees nest in hollow stems left standing over winter. Ladybugs overwinter in leaf litter beneath benches. A biodiverse greenhouse regulates pests naturally, reducing your need for interventions.
Advanced Methods & Variations
Small space growers should use vertical trellises and hanging baskets. Train cucumbers and beans upward to triple your growing area. Organic practitioners can brew compost tea (5 pounds of finished compost in 5 gallons of water, aerated for 24 hours). Apply as a foliar spray every 2 weeks.
Season extension techniques include double-layer glazing and thermal mass. Stack water-filled jugs along north walls. They absorb daytime heat and release it overnight, moderating temperature swings by 10°F.
Troubleshooting: Common Mistakes
Symptom: Seedlings collapse at soil line
Solution: Damping-off fungus thrives in wet, cold soil. Water less frequently and improve air circulation.
Symptom: Yellowing lower leaves
Solution: Nitrogen deficiency. Feed with fish emulsion diluted to half strength (1 tablespoon per gallon).
Symptom: Stunted growth despite warmth
Solution: Compacted roots. Transplant into larger containers immediately.
Symptom: White powdery coating on leaves
Solution: Powdery mildew from poor airflow. Prune crowded foliage and space plants 12 inches apart.
Symptom: Leggy, pale seedlings
Solution: Insufficient light. Move plants closer to LEDs or add supplemental fixtures.
Storage & Maintenance
Water seedlings when the top inch of soil feels dry. Mature plants need approximately 1 inch per week, adjusted for temperature and humidity. Apply diluted fertilizer every 14 days once true leaves appear.
After harvest, remove spent plants immediately. Compost healthy material but burn or trash diseased foliage. Wash all pots in hot soapy water before storing. Stack trays in a dry shed to prevent mold.
Conclusion
Preparing a greenhouse for spring planting demands attention to sanitation, timing, and environmental control. Master these eight steps and you create a production system that feeds your household from April through November. Share your results with local gardening groups; your success inspires others to grow their own food.
Expert FAQs
When should I start seeds indoors for spring transplanting?
Start 6 to 8 weeks before your last expected frost date. Check your local extension office for zone-specific schedules.
What temperature kills seedlings in a greenhouse?
Sustained temperatures above 85°F cause heat stress. Install automatic vents to prevent overheating.
How do I prevent algae growth on greenhouse surfaces?
Improve ventilation to reduce humidity. Clean glazing twice yearly with a 10% bleach solution.
Can I reuse potting soil from last season?
Only if plants were disease-free. Sterilize by baking at 180°F for 30 minutes, then mix in fresh compost.
What is the best fertilizer ratio for spring seedlings?
Use 5-5-5 NPK for balanced growth. Switch to 10-10-10 once plants begin flowering or fruiting.