9 Steps to Prepare an Artistic Light Feature
The smell of damp, anaerobic mud transitioning into aerobic, friable loam signals a garden ready for structural intervention. When the turgor pressure in your perennials is at its peak and the rhizosphere is teeming with microbial activity, you have reached the optimal window to integrate permanent fixtures. Understanding how to prepare a garden for a light requires more than aesthetic placement; it demands a deep dive into soil physics and botanical safety. You must account for the Cation Exchange Capacity (CEC) of your substrate to ensure that trenching for conduits does not disrupt the delicate balance of mineral availability. Improper installation can lead to root desiccation or the introduction of pathogens into the vascular system of your prized specimens. This process is a surgical operation where the health of the soil determines the longevity of the installation. By stabilizing the soil structure and managing moisture levels before the first shovel hits the dirt, you protect the biological integrity of the landscape while extending its functional utility into the nocturnal hours.
Materials:

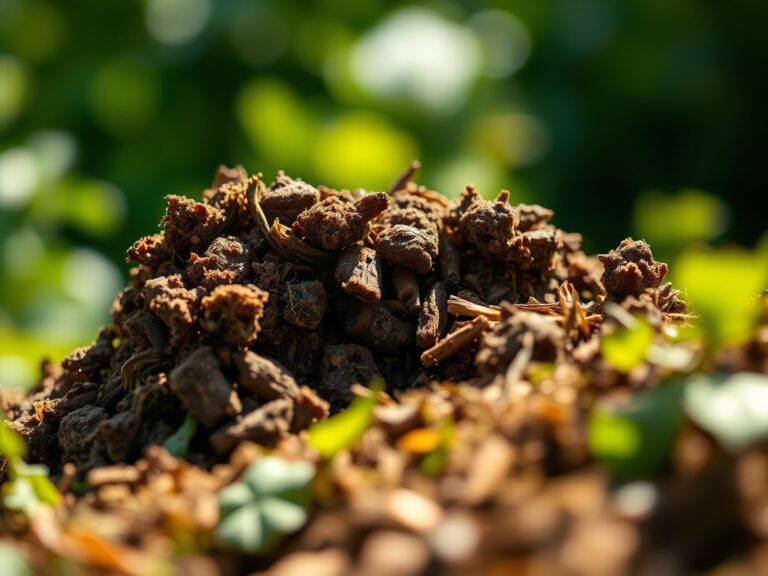
Successful integration begins with a substrate that can support both biological life and mechanical hardware. The ideal soil is a **friable loam** with a **pH between 6.2 and 6.8**. This range ensures that essential micronutrients remain bioavailable and do not corrode metal fixtures through excessive acidity.
Before installation, amend the area with a balanced 10-10-10 NPK ratio if the soil shows signs of depletion. For heavy clay soils with low drainage, incorporate expanded shale to increase pore space. For sandy soils with low CEC, add organic matter to increase the soil's ability to hold onto positively charged ions like Calcium (Ca2+) and Magnesium (Mg2+). You will also need Schedule 40 PVC conduit, direct-burial UF-B cable, and a silicone-based wire connector to prevent moisture ingress.
Timing:
Installation should occur during the dormant season or early spring before the "Biological Clock" triggers the transition from vegetative to reproductive stages. In Hardiness Zones 4 through 7, this window typically falls between the last hard freeze and the point when soil temperatures consistently reach 55 degrees Fahrenheit.
Avoid trenching during the peak of the growing season when plants are prioritizing auxin-driven apical dominance. Interrupting the root system during high transpiration periods can lead to immediate wilting and permanent vascular damage. By timing your preparation for the late dormant phase, you allow the root architecture to recover before the spring flush of growth demands maximum nutrient uptake.
Phases:

Sowing and Site Preparation
Clear a radius of 18 inches around the intended light location. Remove all competitive weeds and organic debris that could harbor fungal spores. Dig a trench at least 6 to 12 inches deep, depending on local building codes, to house the electrical lines.
Pro-Tip: Always hand-dig near established trees to preserve the mycorrhizal symbiosis. These fungal networks extend the reach of the root system; severing them reduces the plant's ability to absorb phosphorus and water.
Transplanting and Rerouting
If a plant sits directly in the path of the light beam or the conduit, it must be moved. Use a hori-hori knife to cut a clean circle around the root ball, maintaining as much original soil as possible to prevent transplant shock. Re-plant at the same depth as the original site to avoid stem rot.
Pro-Tip: When repositioning plants, orient them to account for phototropism. Plants naturally grow toward the strongest light source; placing a high-intensity LED too close to a shade-loving species can cause leaf scorch and disrupt the natural growth habit.
Establishing and Backfilling
Once the fixture is set, backfill the trench with a mixture of native soil and finished compost. Tamp the soil down firmly to eliminate air pockets, which can cause root desiccation. Apply a 2-inch layer of hardwood mulch to regulate soil temperature and moisture.
Pro-Tip: Avoid mounding mulch against the base of the light fixture or the plant stems. This prevents adventitious root growth in the mulch layer, which makes the plant more susceptible to drought and temperature fluctuations.
The Clinic:
Physiological disorders often arise from the mechanical stress of installation. Monitor your plants for these specific symptoms:
- Symptom: Interveinal chlorosis (yellowing between leaf veins).
- Solution: This indicates a Nitrogen or Iron deficiency caused by soil compaction during construction. Use a soil penetrometer to check for compaction and apply a chelated iron spray or a high-nitrogen liquid fertilizer to restore color.
- Symptom: Marginal leaf burn or necrosis.
- Solution: This is often a sign of root pruning stress. Increase irrigation frequency to maintain high turgor pressure until the root system regenerates.
- Symptom: Premature senescence (early leaf drop).
- Solution: Check for stray voltage or heat dissipation from the light fixture. High-heat halogen bulbs can cook nearby foliage; switch to cool-running LEDs to mitigate thermal stress.
Fix-It: For Nitrogen chlorosis, apply a blood meal amendment at a rate of 2 pounds per 100 square feet. This provides a slow-release nitrogen source that supports chlorophyll production without causing a sudden surge in vegetative growth that might attract pests.
Maintenance:
Precision is the hallmark of a professional garden. Use a soil moisture meter twice weekly to ensure the root zone remains at 60 to 70 percent field capacity. Most established landscapes require 1.5 inches of water per week delivered at the drip line, not the trunk.
Utilize bypass pruners to maintain a clear path for the light beam. Prune back any water sprouts or suckers that emerge near the fixture, as these can block the light and harbor insects. Inspect the electrical connections annually for signs of corrosion or pest damage. A hori-hori knife is an excellent tool for weeding around the base of the light without damaging the buried conduit.
The Yield:
While a light feature is not a crop, the "yield" is the sustained health and visual clarity of the landscape. For flowering plants positioned near lights, harvest spent blooms regularly to prevent the plant from shifting energy into seed production. This encourages a longer flowering period. When cutting flowers for indoor use, do so in the early morning when turgor pressure is highest. Submerge the stems immediately in 110-degree Fahrenheit water to remove air bubbles from the xylem, ensuring "day-one" freshness for up to a week.
FAQ:
How deep should I bury the light cables?
Bury low-voltage cables at least 6 inches deep. For line-voltage (120V), codes usually require 12 to 18 inches within a rigid PVC conduit. Always consult local electrical codes and call utility locators before digging to ensure safety and compliance.
Can artificial light disrupt my plants' growth?
Yes. High-intensity light can interfere with the photoperiodism of short-day plants, preventing flowering. Use shielded fixtures and warm-spectrum LEDs (2700K) to minimize the impact on the plant's internal circadian rhythm and natural growth cycles.
What is the best soil for a light base?
Use a well-draining sandy loam or crushed stone base. This prevents water from pooling around the fixture, which can lead to electrical failure or root rot in nearby plants. Ensure the soil pH remains near 6.5 to prevent metal corrosion.
How do I fix yellow leaves after digging?
Yellowing often signals Nitrogen chlorosis or root shock. Apply a balanced liquid fertilizer with a 10-10-10 NPK ratio and ensure the plant receives 1.5 inches of water weekly. This supports the vascular system while the roots recover from mechanical disturbance.